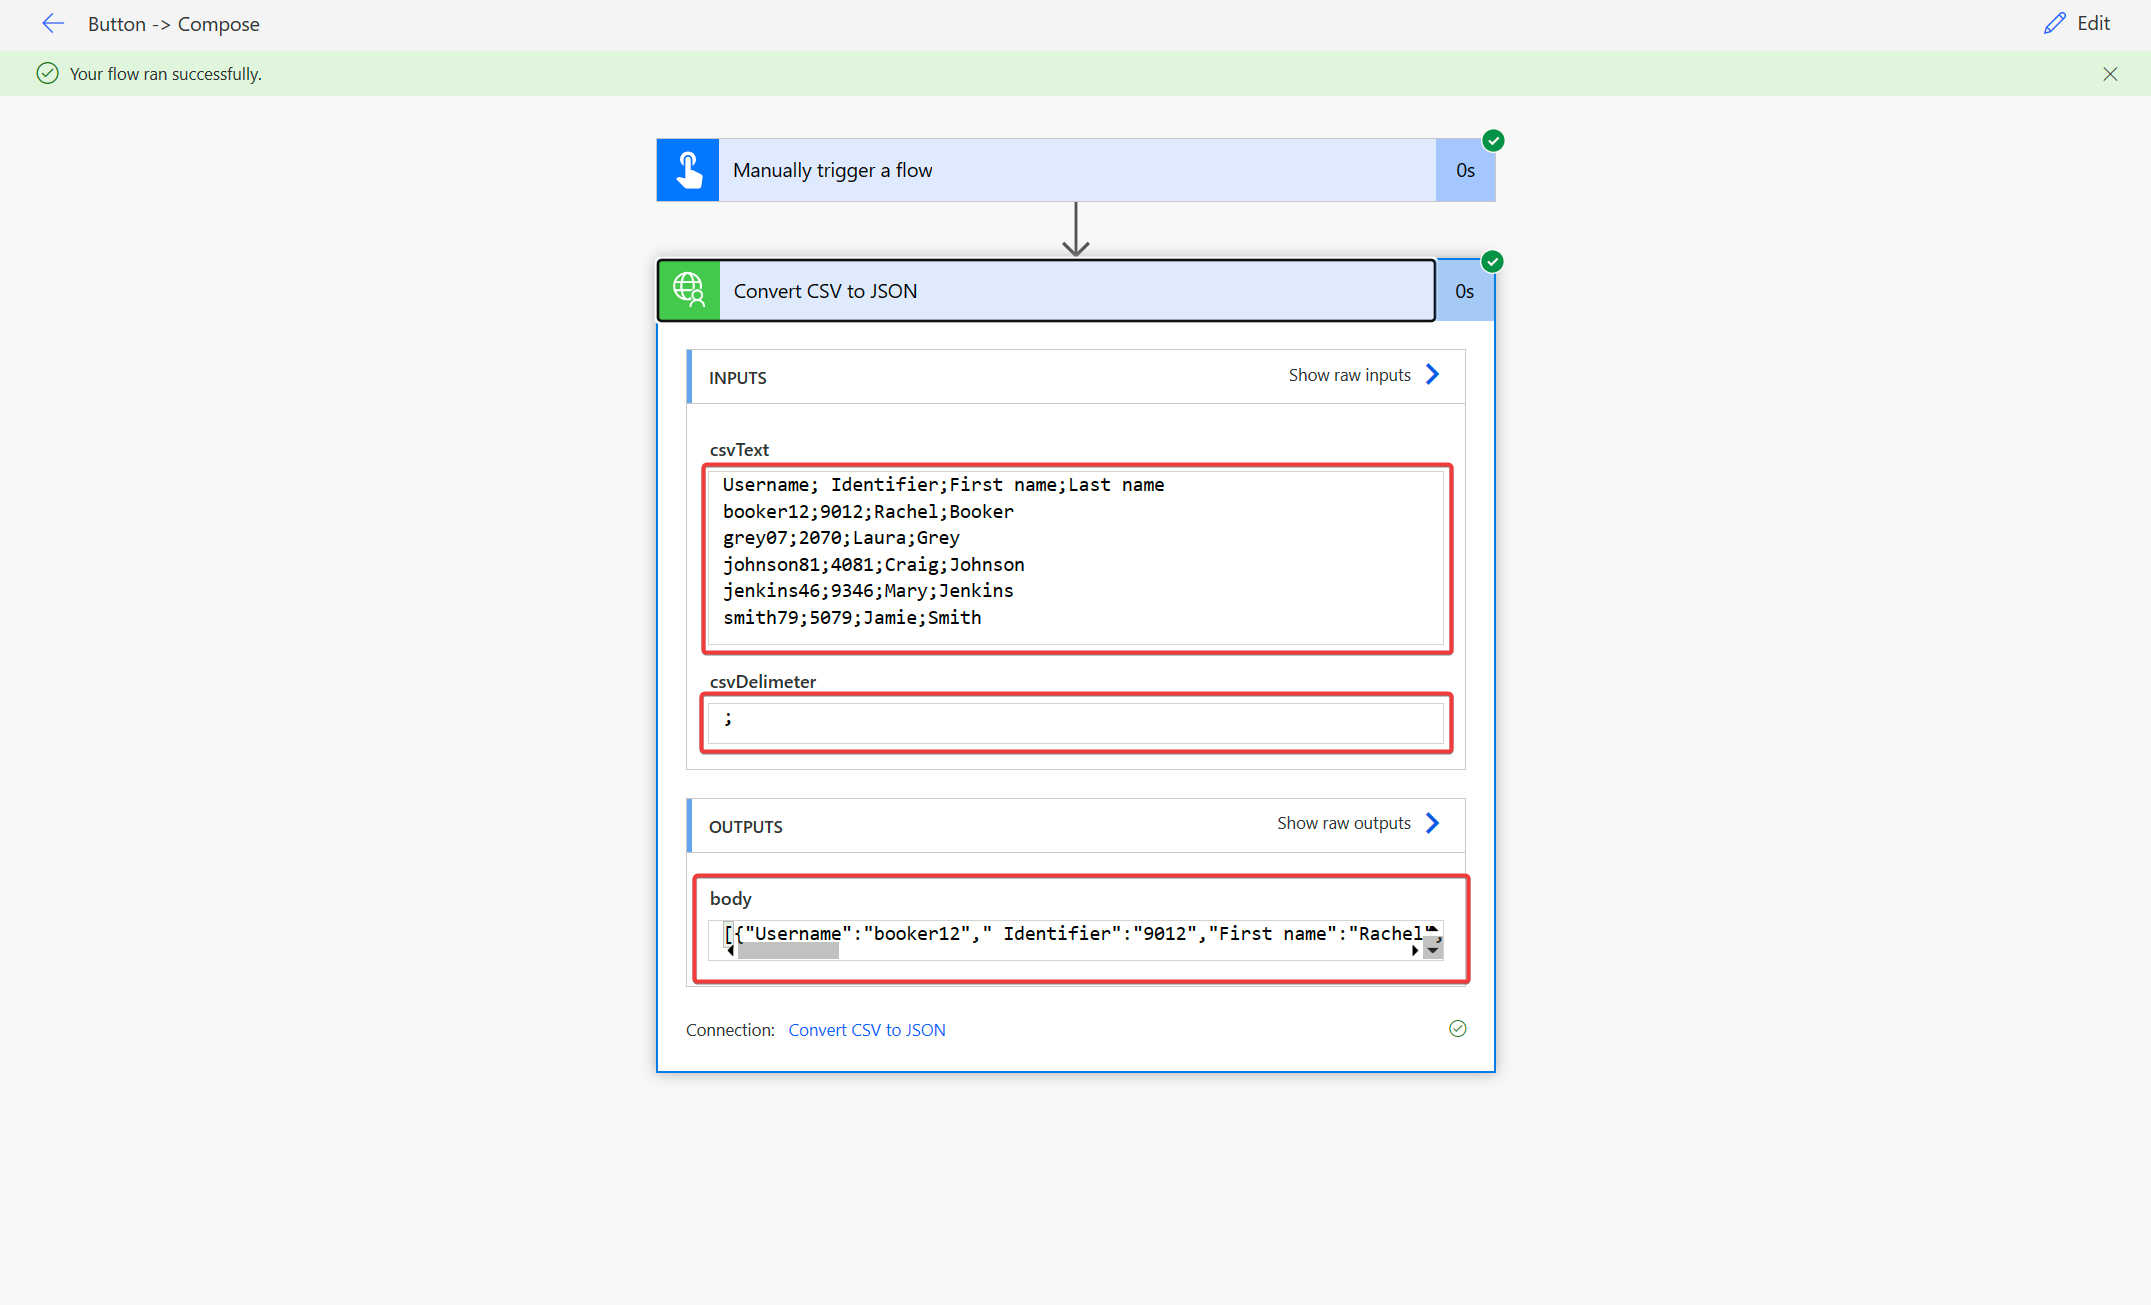
Hey there, fellow developers! Have you ever encountered the need to convert CSV text to JSON format within the Power Platform? It's a task that we often come across, and in this blog post, I'll walk you through a powerful solution that will save you time and effort. Let's dive in!
Standard Ways and Their Limitations:
When it comes to converting CSV to JSON, a mix of standard connectors within the Power Platform offer some functionality. However, relying solely on these connectors can lead to excessive API calls within your flow, which might not be ideal. Additionally, while there are third-party services available (Encodian, Converter by Power2Apps, Advanced Data Operations etc. ), they often come with an extra cost.
Introducing the Custom Connector Option:
Fortunately, there's a premium feature in the Power Platform that allows developers like us to take full control of the code and overcome the limitations of standard connectors. Enter the custom connector option! Although it comes with a price tag, the level of control it provides makes it a valuable tool for tackling complex conversion tasks. Yes, it might cost you extra, if you have not purchased a Premium license. However, apart from this specific use case the premium license will also open for you tons of other connectors and functionality.
Creating a Custom Connector - Step by Step:
Let's create a custom connector and add some C# code to it.
-
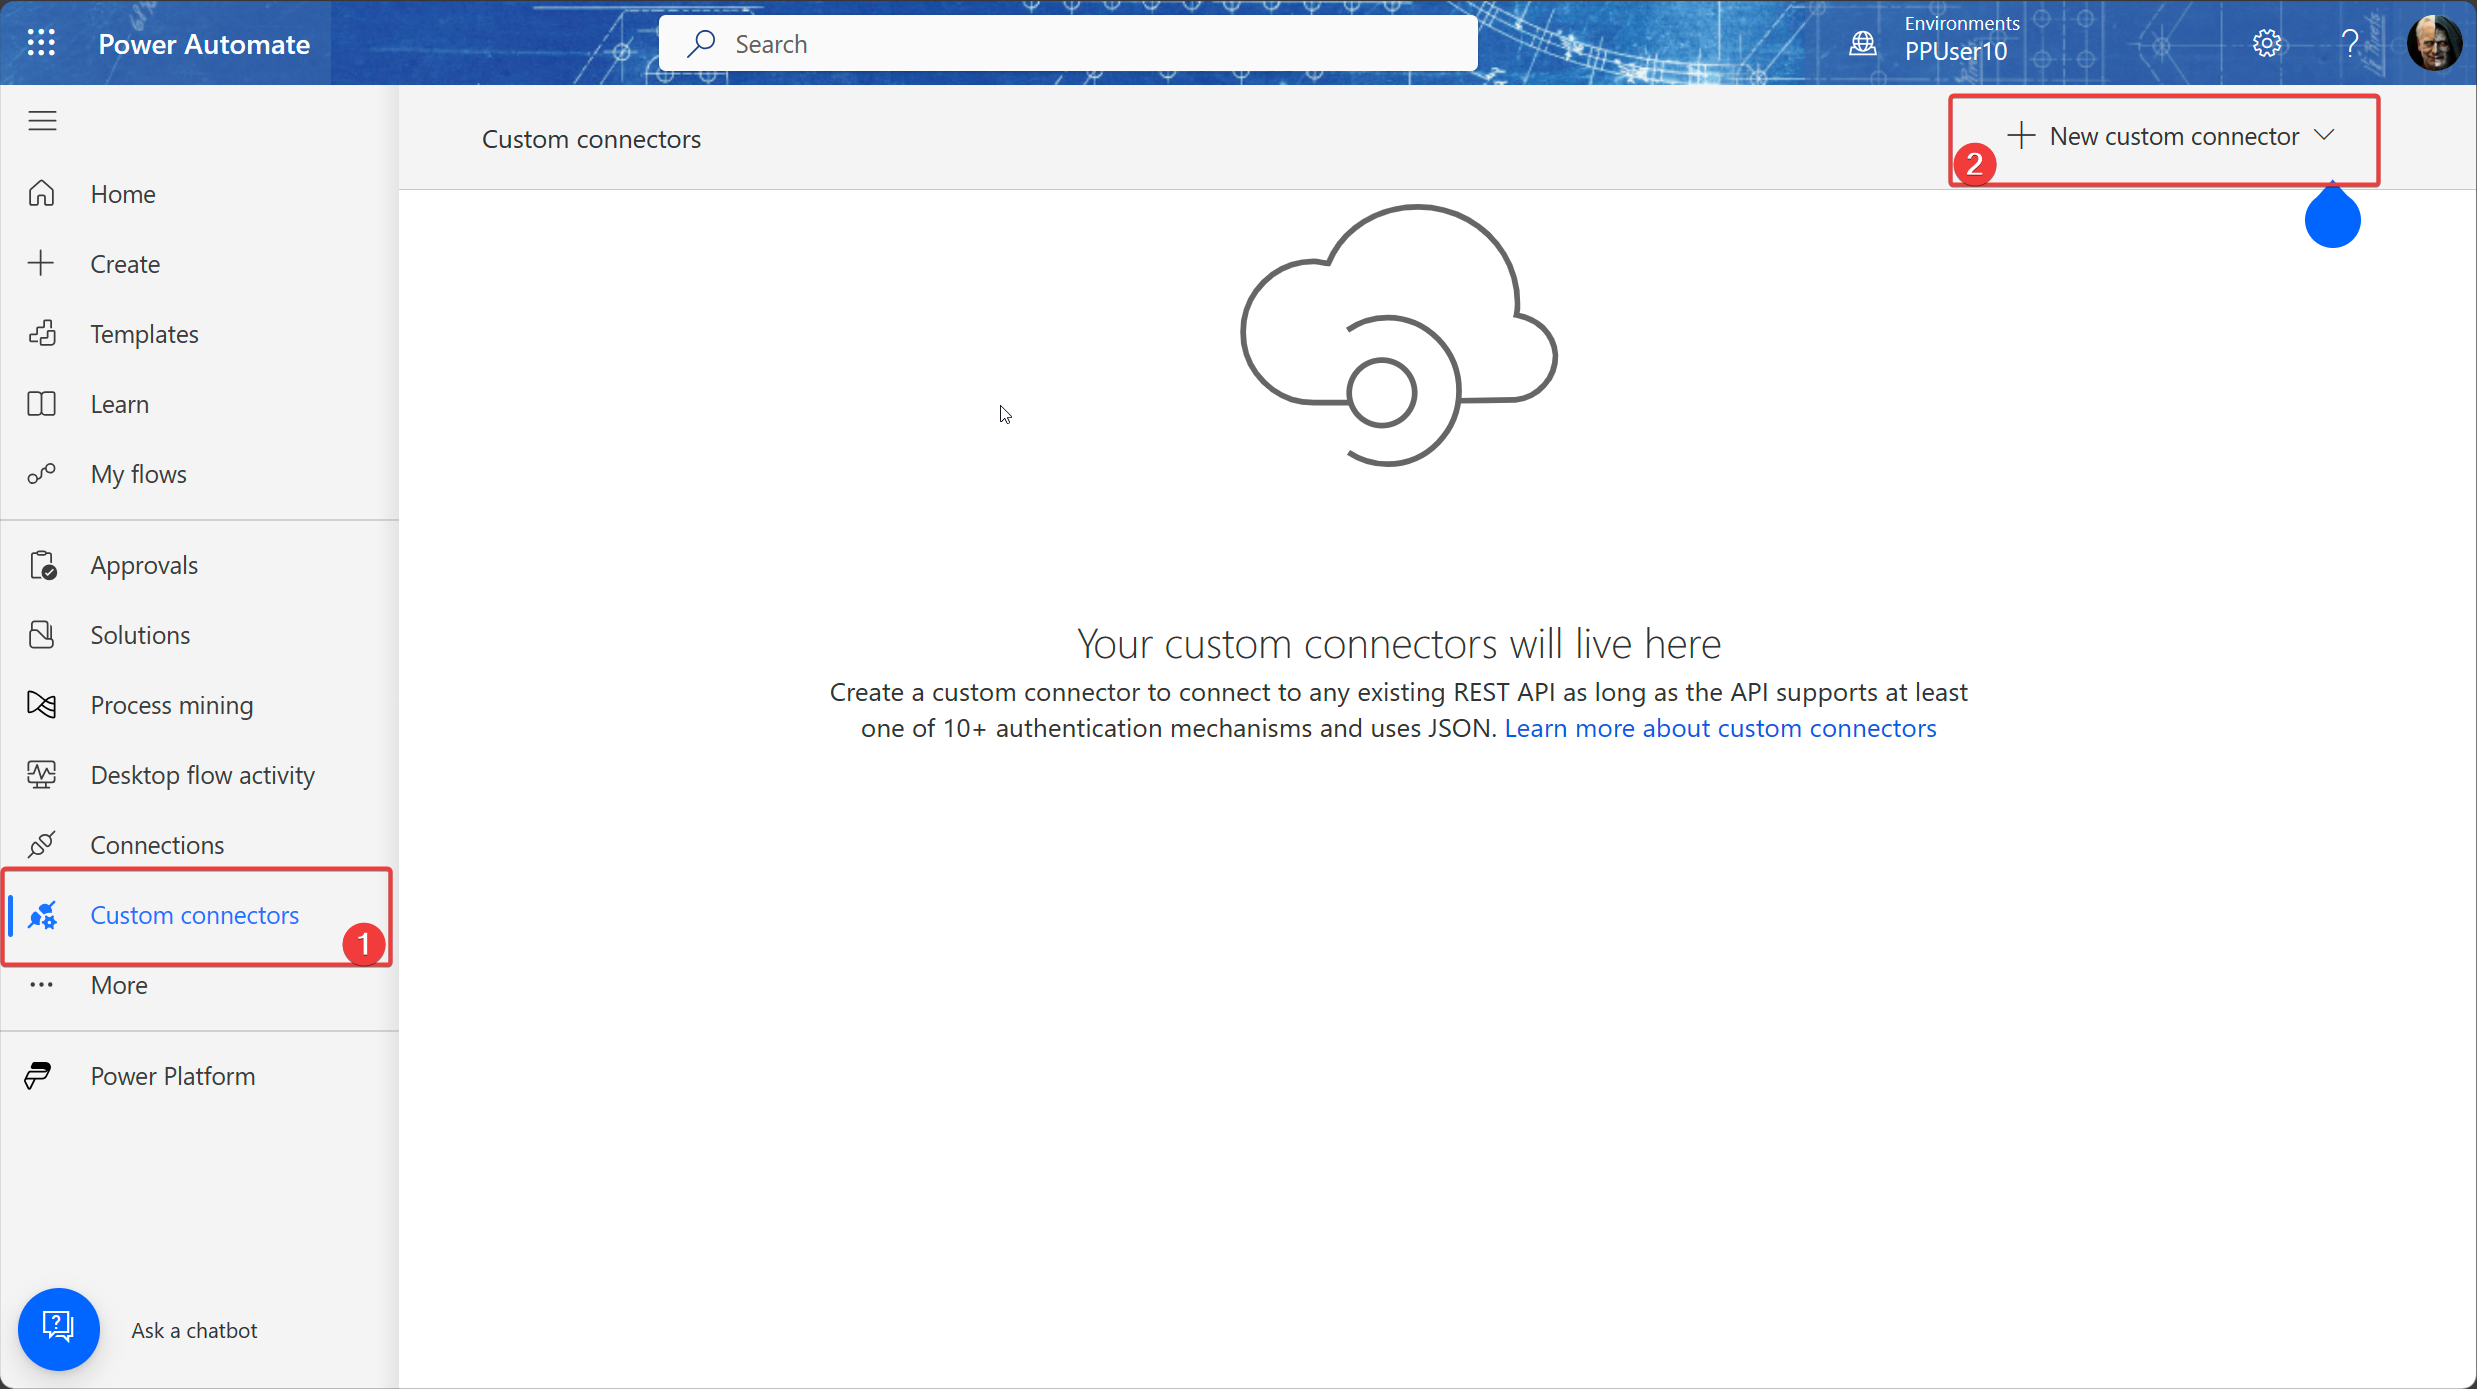
Start by navigating to the Power Platform and accessing the Power Apps Maker or Power Automate Maker portal.
-
From the left-hand navigation pane, select the "Data" tab, and then click on "Custom connectors."
-
Click on "New custom connector" to begin the creation process.
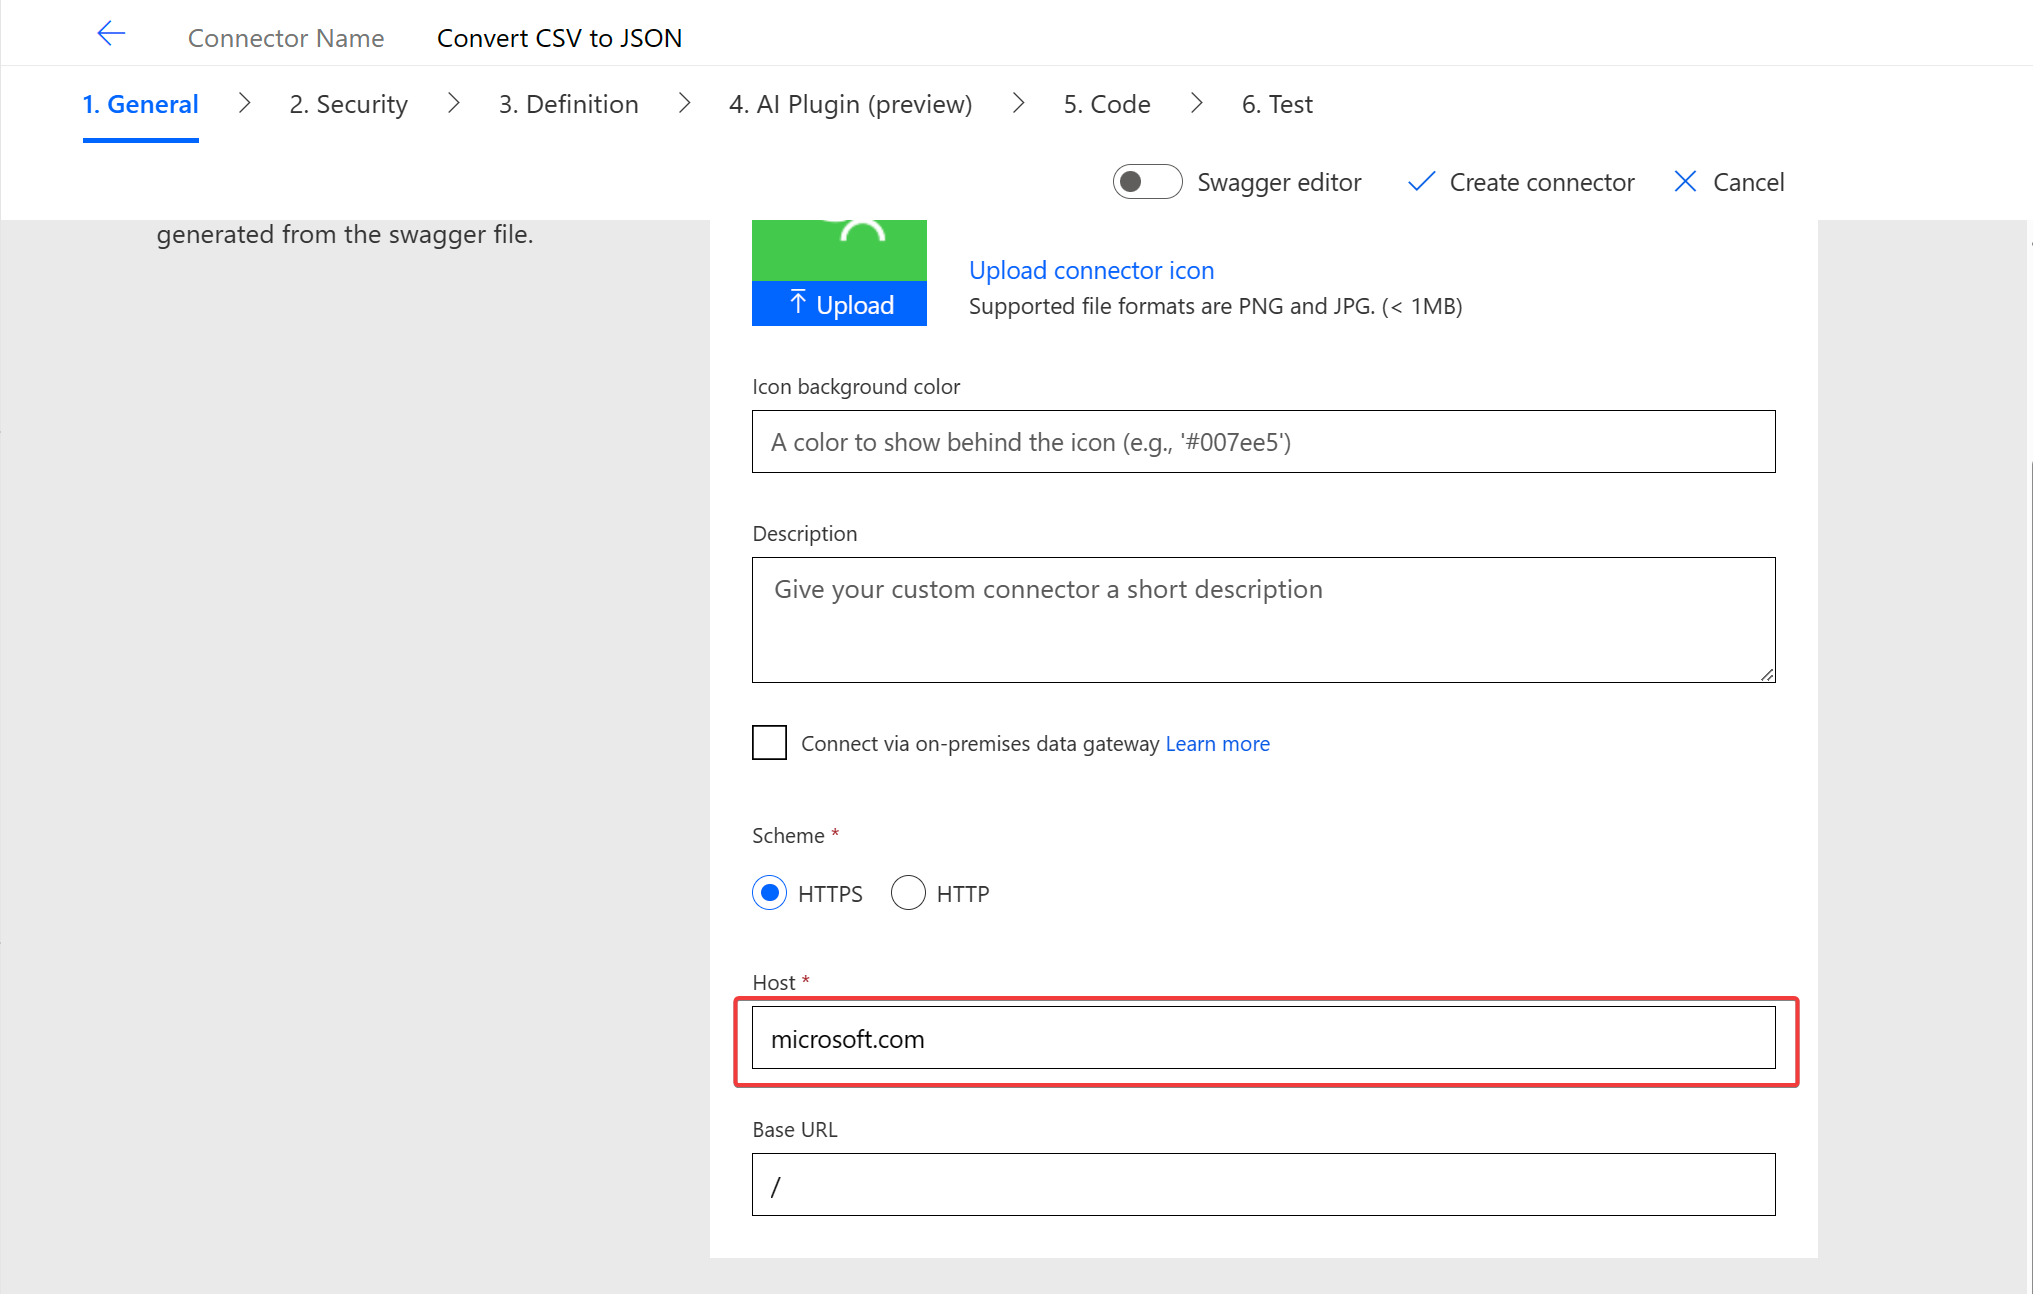
- Give your custom connector a name and a suitable description if needed. In the Host field you can specify any url. We will not be making any external call, but execute a code instead
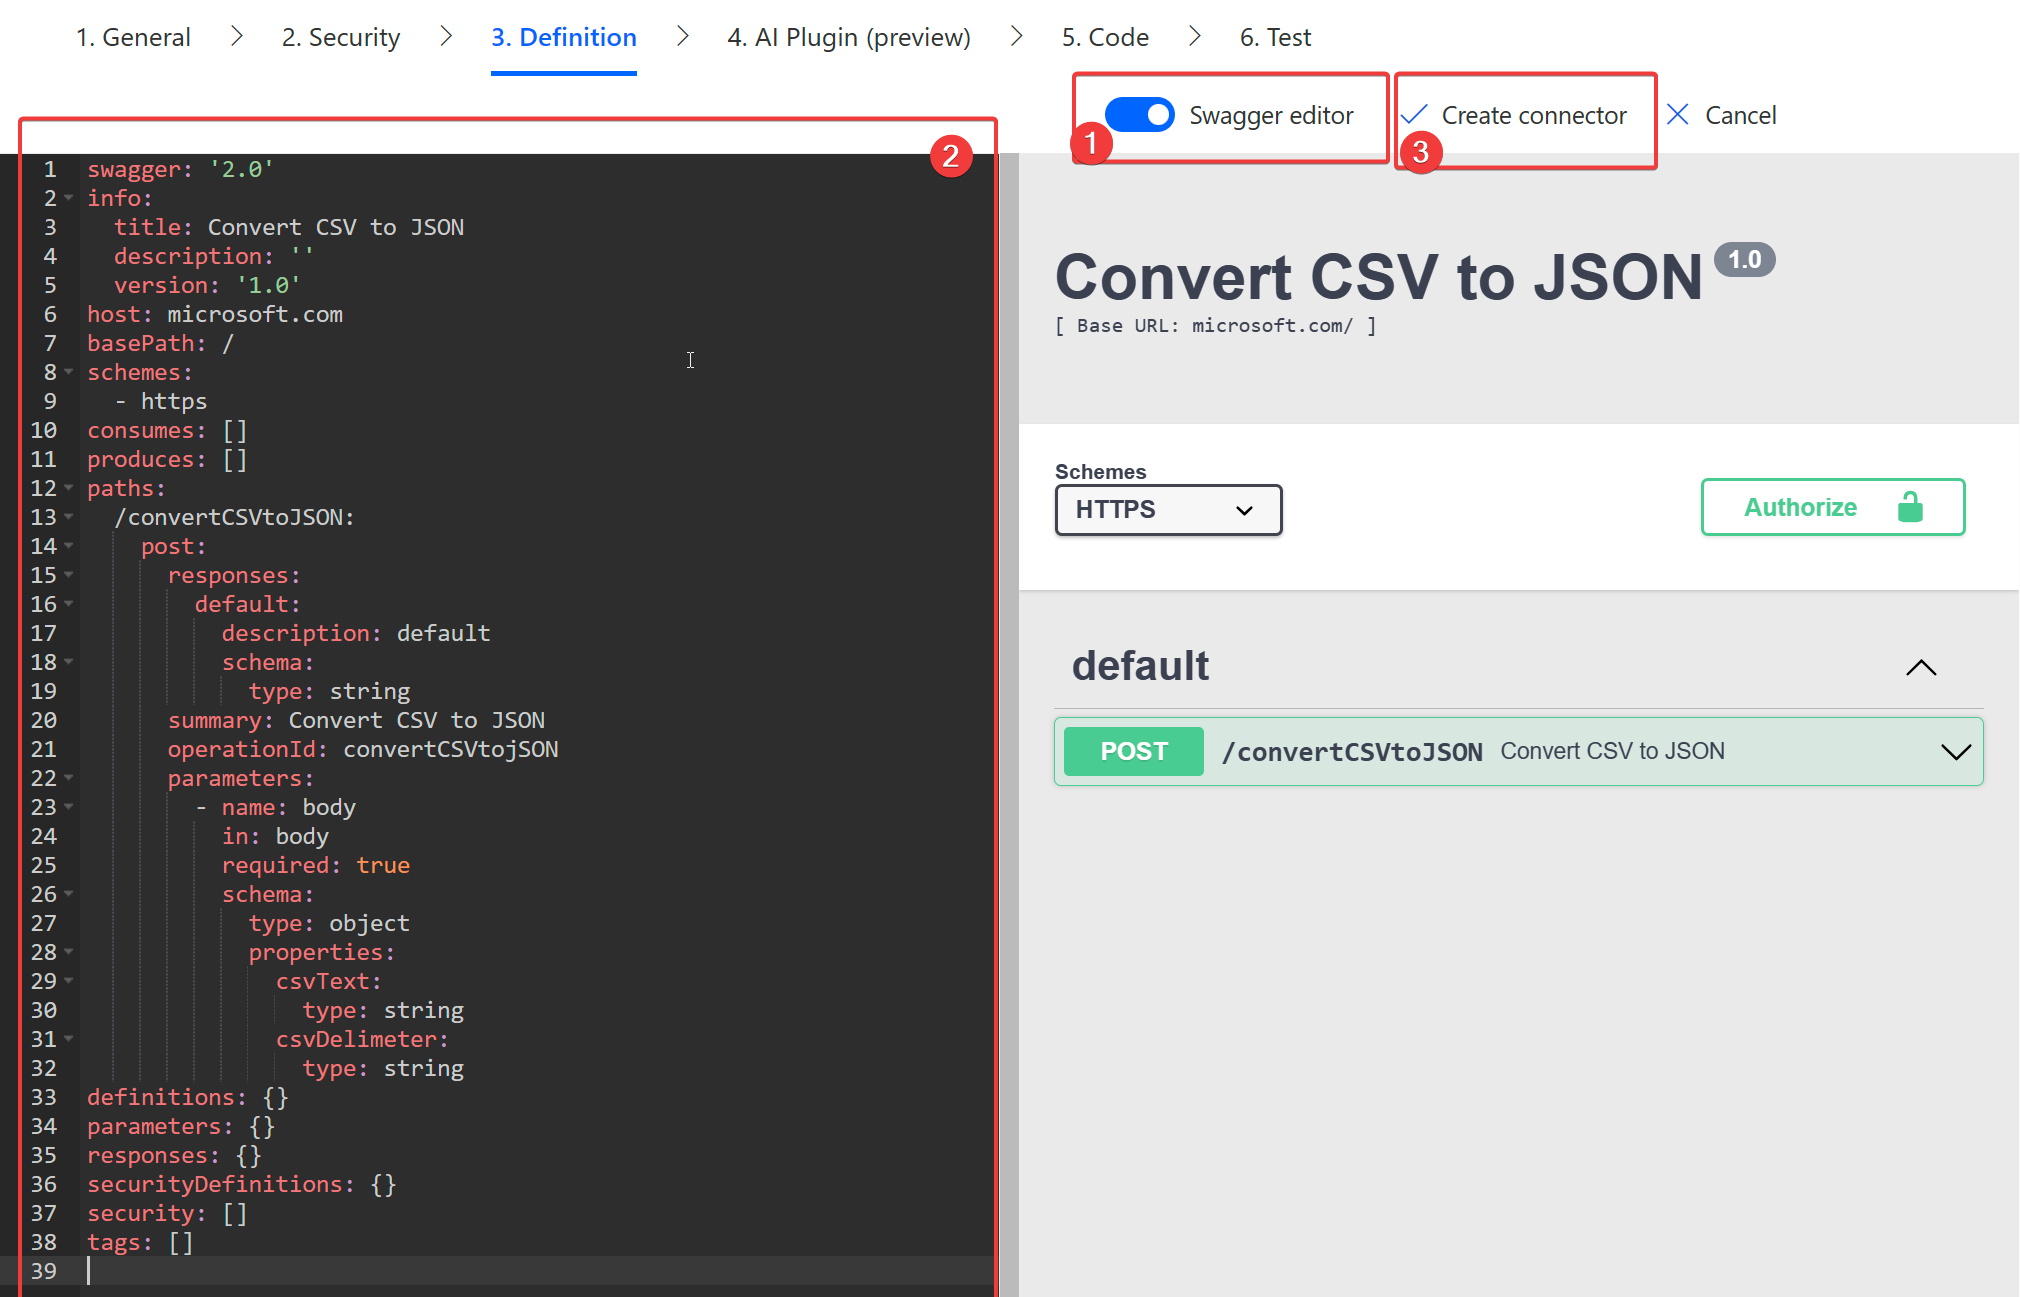
- Now we need to create an action and a couple of input parameters. We can make it possible to define the delimiter, to make sure we can parse various CSV formats. Therefore, switch to the Swagger Editor and paste the code below.
swagger: '2.0'
info:
  title: Convert CSV to JSON
  description: ''
  version: '1.0'
host: microsoft.com
basePath: /
schemes:
  - https
consumes: []
produces: []
paths:
  /convertCSVtoJSON:
    post:
      responses:
        default:
          description: default
          schema:
            type: string
      summary: Convert CSV to JSON
      operationId: convertCSVtojSON
      parameters:
        - name: body
          in: body
          required: true
          schema:
            type: object
            properties:
              csvText:
                type: string
              csvDelimeter:
                type: string
definitions: {}
parameters: {}
responses: {}
securityDefinitions: {}
security: []
tags: []
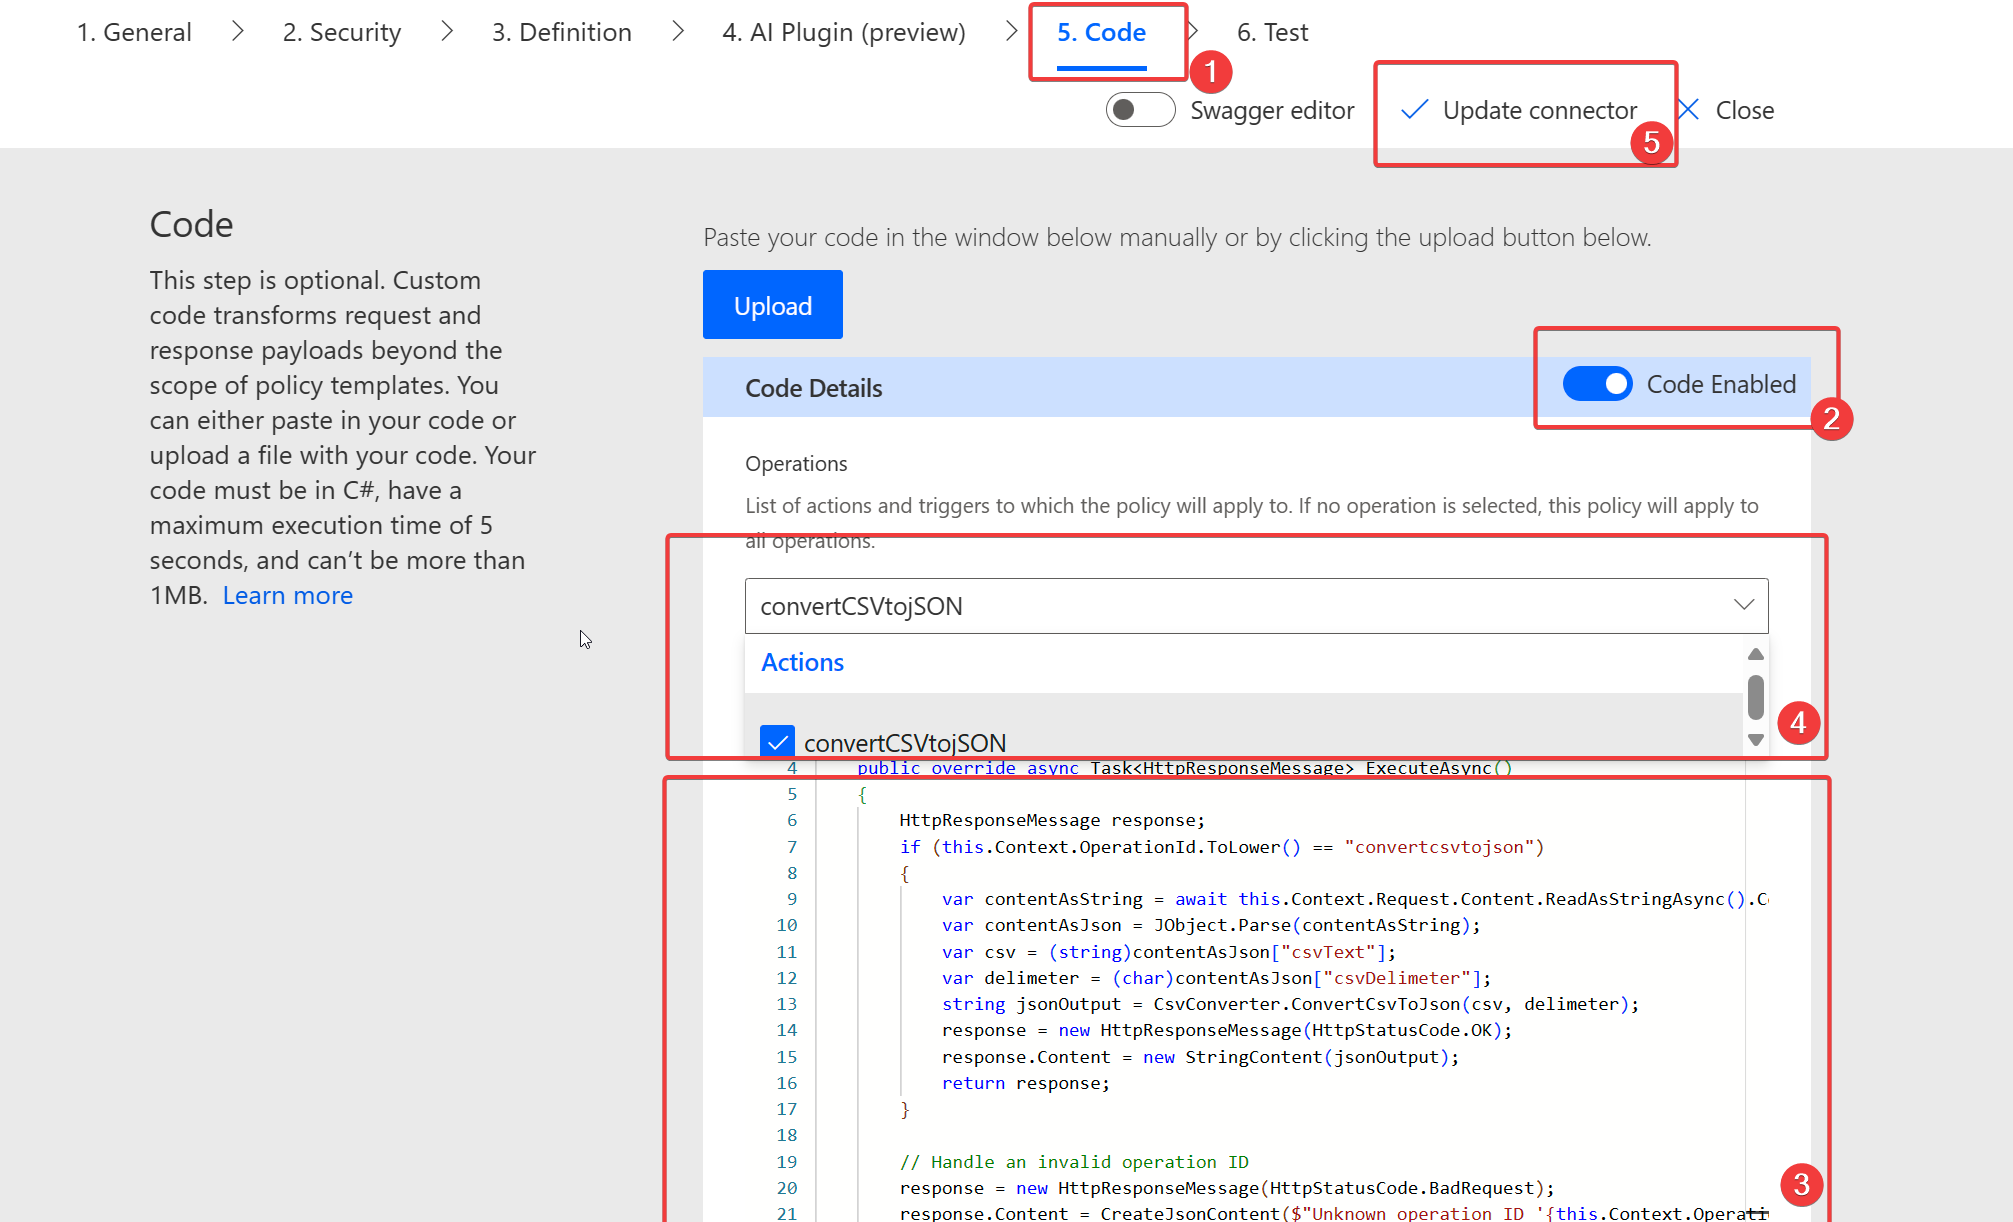
- After you created the custom connector, navigate to the Code section and enable it and paste the piece of code, written below. Please, do not forget to enable code execution for the action, that we created with the swagger:
using System.Data;
public class Script : ScriptBase
{
    public override async Task<HttpResponseMessage> ExecuteAsync()
    {
        HttpResponseMessage response;
        if (this.Context.OperationId.ToLower() == "convertcsvtojson")
        {
            var contentAsString = await this.Context.Request.Content.ReadAsStringAsync().ConfigureAwait(false);
            var contentAsJson = JObject.Parse(contentAsString);
            var csv = (string)contentAsJson["csvText"];
            var delimeter = (char)contentAsJson["csvDelimeter"];
            string jsonOutput = CsvConverter.ConvertCsvToJson(csv, delimeter);
            response = new HttpResponseMessage(HttpStatusCode.OK);
            response.Content = new StringContent(jsonOutput);
            return response;
        }
        // Handle an invalid operation ID
        response = new HttpResponseMessage(HttpStatusCode.BadRequest);
        response.Content = CreateJsonContent($"Unknown operation ID '{this.Context.OperationId}'");
        return response;
    }

    public class CsvConverter
    {
        public static string ConvertCsvToJson(string csvText, char delimiter)
        {
            string[] lines = csvText.Split(new[] { "\r\n", "\r", "\n" }, StringSplitOptions.RemoveEmptyEntries);
            string[] headers = lines[0].Split(delimiter);
            var jsonArray = new List<Dictionary<string, string>>();

            for (int i = 1; i < lines.Length; i++)
            {
                string[] fields = lines[i].Split(delimiter);
                var jsonObject = new Dictionary<string, string>();

                for (int j = 0; j < headers.Length; j++)
                {
                    if (fields.Length > j)
                        jsonObject[headers[j]] = fields[j];
                    else
                        jsonObject[headers[j]] = string.Empty;
                }
                jsonArray.Add(jsonObject);
            }
            return Newtonsoft.Json.JsonConvert.SerializeObject(jsonArray);
        }
    }
}
- You can save your custom connector and test.
Please, make sure you test the custom connector inside the flow. The Test section of the custom connector editor removes the invisible line breaks, which are normally obtained from files.
- Once everything is in place, save and publish your custom connector to use within the Power Platform. When you obtain the JSON as text inside the flow, you can use the ParseJSON action, to You can use them ParseJSON
Accessing Source Code and Additional Resources
As promised, I've got something extra for you! If you're interested in exploring the source code or getting a deeper understanding of how the custom connector works or you want simply to install the Connector and start using it, hrer is a GitHub repo for you: Power Platform Stuff. Feel free to download the source code and adapt it to suit your needs.
Conclusion
By leveraging the custom connector option within the Power Platform, we can convert CSV text to JSON format efficiently and without relying on excessive API calls or costly third-party services. I hope this step-by-step guide has helped you understand how to create a custom connector and given you the tools to tackle this task with ease. Happy coding!


